# 组件生命周期
# 生命周期 & 生命周期函数
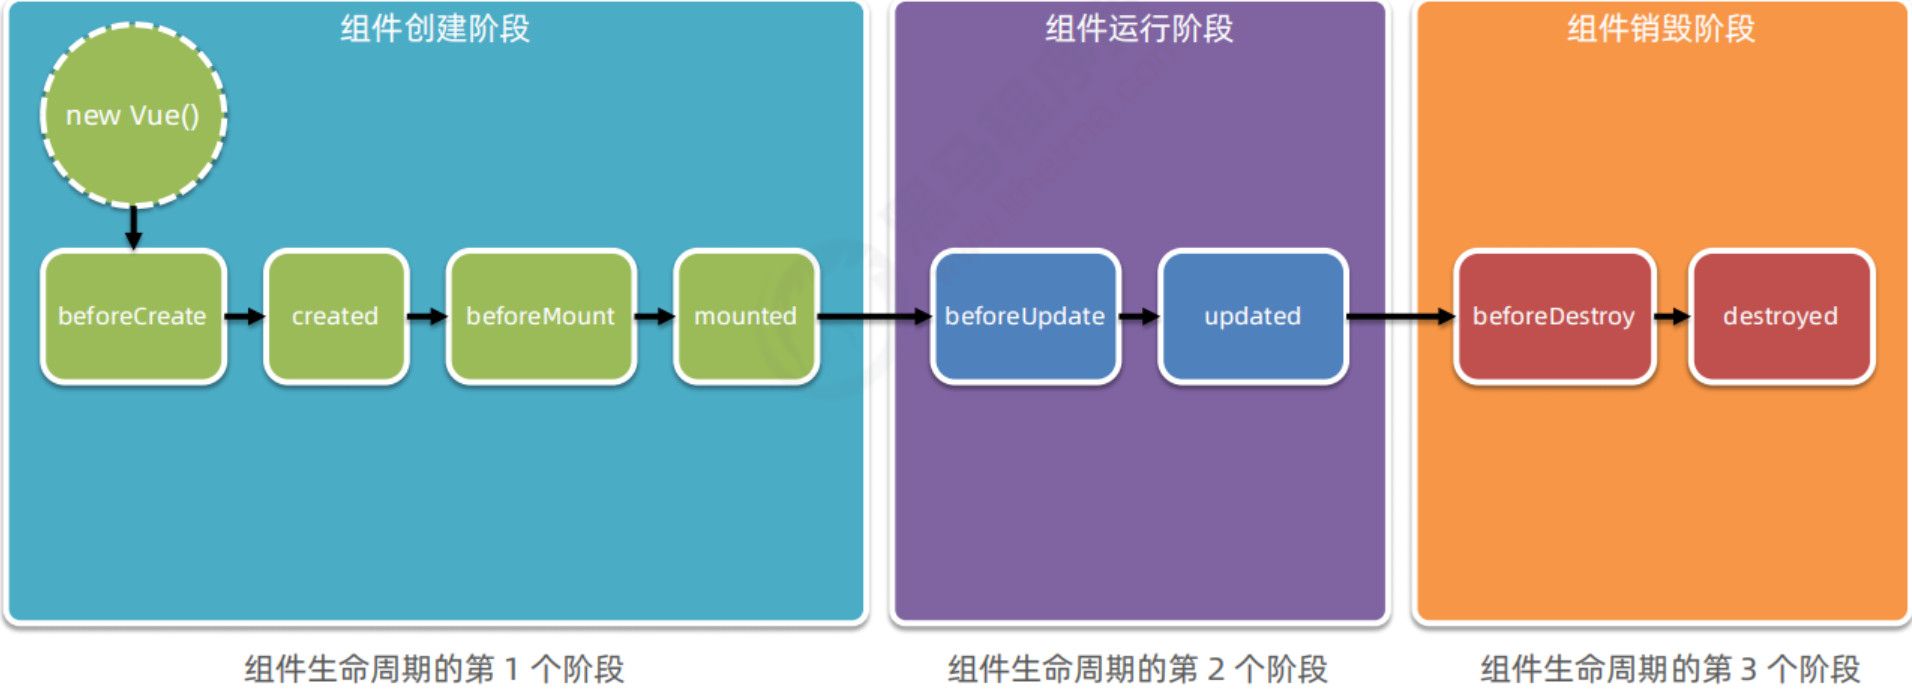
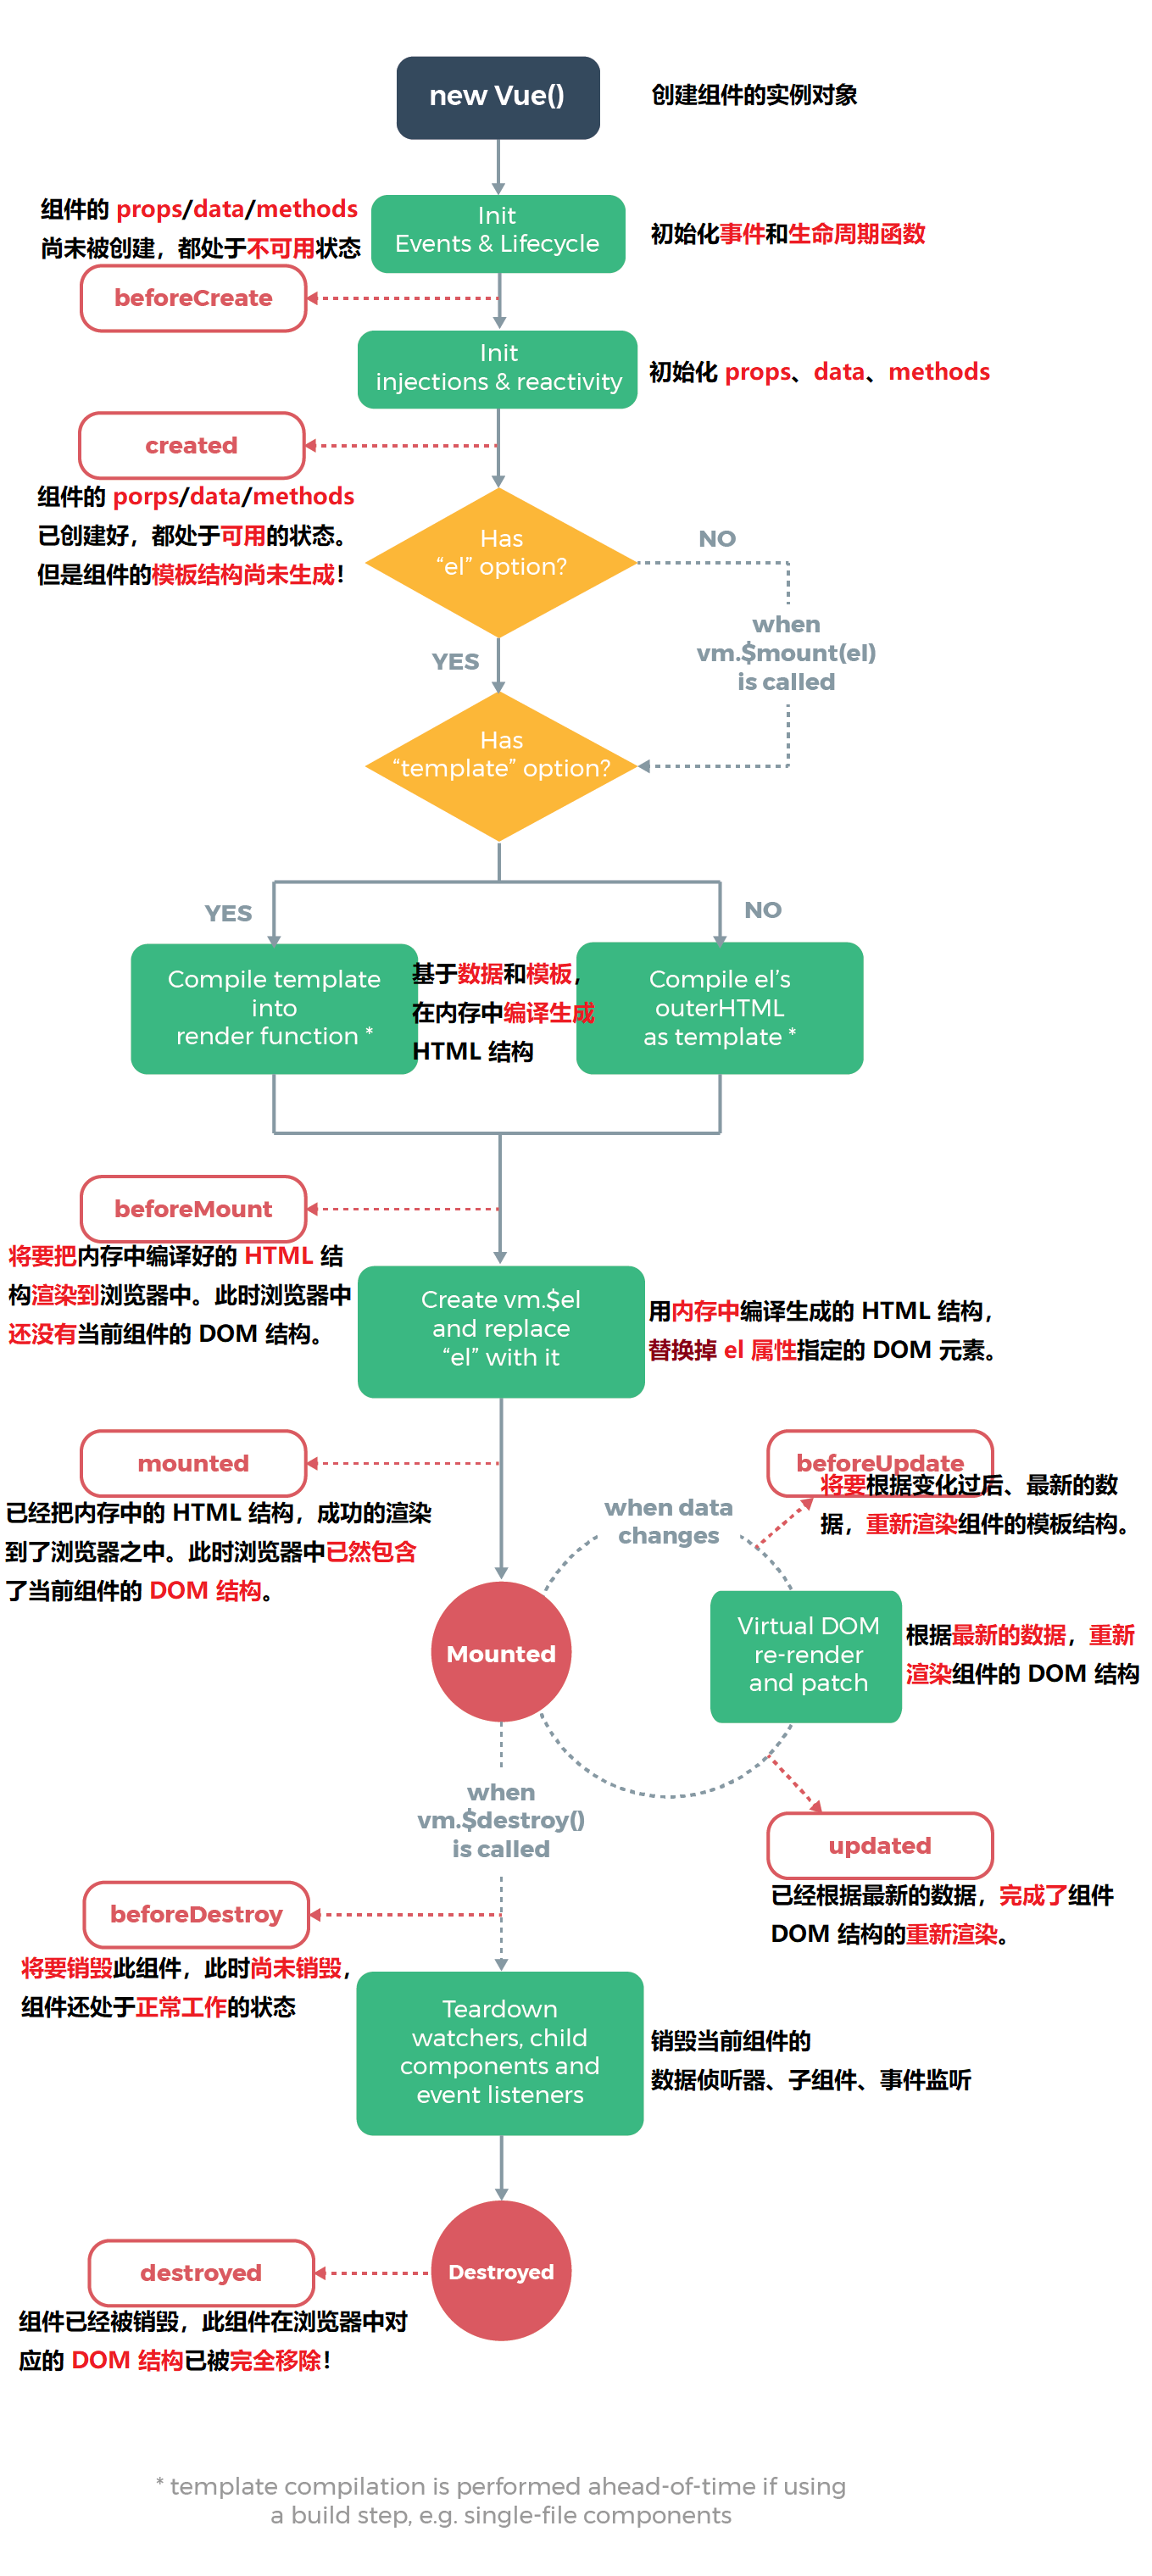
生命周期(Life Cycle)是指一个组件从创建 -> 运行 -> 销毁的整个阶段,强调的是一个时间段
生命周期函数:是由 vue 框架提供的内置函数,会伴随着组件的生命周期,自动按次序执行
# 组件生命周期函数的分类


# 组件之间的数据共享
# 组件之间的关系
- 父子关系
- 兄弟关系
# 父子组件之间的数据共享
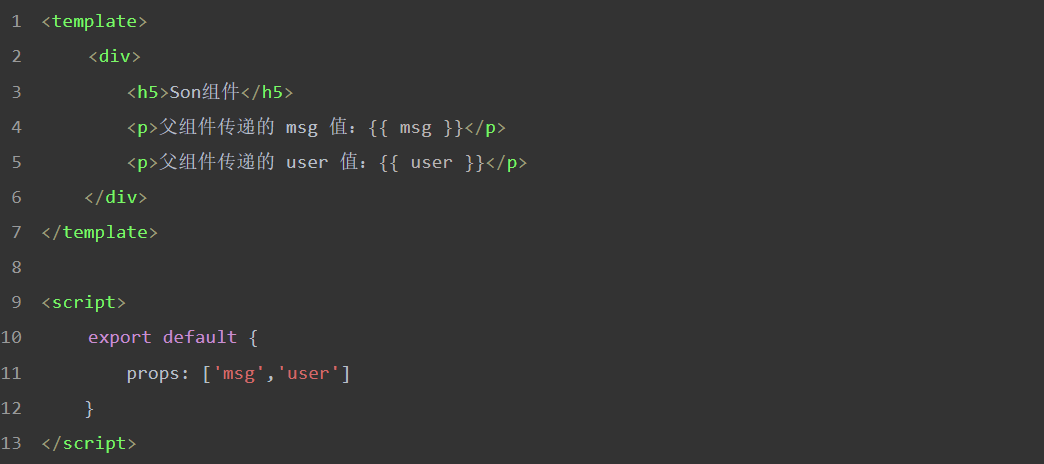
# 父组件向子组件共享数据
<Son :msg="messgae" :user="userinfo"></Son> | |
data() { | |
return { | |
message: 'baozi', | |
userinfo: { | |
name: 'baozi', | |
age: 20 | |
} | |
} | |
} |

# 子组件向父组件共享数据
子组件向父组件共享数据使用自定义事件
# 父组件
<template> | |
<Son @numberchage="getNewCount"></Son> | |
</template> | |
<script> | |
export default { | |
data() { | |
return { | |
countFromSon: 0 | |
} | |
}, | |
methods: { | |
getNewCount(val) { | |
this.countFromSon = val | |
} | |
} | |
} | |
</script> |
# 子组件
<script> | |
export default { | |
data() { | |
return { | |
count: 1 | |
} | |
}, | |
methods: { | |
add() { | |
this.count += 1; | |
this.$emit('numberchage',this.count); | |
} | |
} | |
} | |
</script> |
# 兄弟组件之间的数据共享
在 vue2.x 中,兄弟组件之间数据共享的方案是 EventBus
# eventBus.js
import Vue from 'vue' | |
// 向外共享 Vue 实例对象 | |
export default new Vue() |
# 兄弟组件 A(send)
<script> | |
import bus from './eventBus.js' | |
export default { | |
data() { | |
return { | |
msg: 'baozi is cool' | |
} | |
}, | |
methods: { | |
sendMsg() { | |
bus.$emit('share',this.msg); | |
} | |
} | |
} | |
</script> |
# 兄弟组件 B(receive)
<script> | |
import bus from './eventBus.js' | |
export default { | |
data() { | |
return { | |
msgFromLeft: '' | |
} | |
}, | |
created() { | |
bus.$on('share',(val) => { | |
this.msgFromLeft = val; | |
}) | |
} | |
} | |
</script> |
# eventsBus 使用步骤总结
- ① 创建 eventBus.js 模块,并向外共享一个 Vue 的实例对象
- ② 在数据发送方,调用 bus.$emit (' 事件名称 ', 要发送的数据) 方法触发自定义事件
- ③ 在数据接收方,调用 bus.$on (' 事件名称 ', 事件处理函数) 方法注册一个自定义事件
# ref 引用
# ref 引用介绍
ref 用来辅助开发者在不依赖于 jQuery 的情况下,获取 DOM 元素或组件的引用,每个 vue 的组件实例上,都包含一个 $refs 对象,里面存储着对应的 DOM 元素或组件的引用
默认情况下,组件的 $refs 指向一个空对象
<template> | |
<div> | |
<h3 ref="myh3"></h3> | |
<button @click="getRef">获取 $refs 对象</button> | |
</div> | |
</template> | |
<script> | |
export default { | |
methods: { | |
getRef() { | |
console.log(this.$refs.myh3); | |
} | |
} | |
} | |
</script> |
# 使用 DOM 元素
<template> | |
<div> | |
<h3 ref="myh3"></h3> | |
<button @click="getRef">获取 $refs 对象</button> | |
</div> | |
</template> | |
<script> | |
export default { | |
methods: { | |
getRef() { | |
console.log(this.$refs.myh3); | |
this.$refs.myh3.style.color = 'red'; | |
} | |
} | |
} | |
</script> |
# 使用 ref 引用组件实例
<template> | |
<div> | |
<Left ref="comLeft"></Left> | |
<button @click="getRef">获取 $refs 对象</button> | |
</div> | |
</template> | |
<script> | |
export default { | |
methods: { | |
getRef() { | |
this.$refs.comLeft.add(); | |
} | |
} | |
} | |
</script> |
# this.$nextTick (cb) 方法
组件的 $nextTick (cb) 方法,会把 cb 回调推迟到下一个 DOM 更新周期之后执行,通俗的理解是:等组件的 DOM 更新完成之后,再执行 cb 回调函数
<script> | |
export default { | |
methods: { | |
showInput() { | |
this.inputVisable = true; | |
this.$nextTick(() => { | |
this.$refs.ipt.focu | |
}) | |
} | |
} | |
} | |
</script> |